Star Tracker vs Telescope for Astrophotography: Which Should You Buy First?

This question trips up many first-time astrophotographers. A telescope sounds like the natural place to start. It is the iconic piece of gear, and it is the thing you would picture in a photo of an astronomer. But for photography, the telescope is often the wrong first purchase, and a small star tracker is a far better one.
Here is how to think about the choice, so that you buy the gear that fits your goal instead of the gear that looks the part. If you are working out which telescope to buy for viewing, our beginner telescope list is the place to start.
What each one actually does
A star tracker is a small motorized mount that turns your camera at the same rate as the sky's apparent rotation. Because the camera follows the stars, you can take exposures of a minute or more without the stars smearing into trails. That reveals many more stars, the Milky Way's structure and faint glows that a fixed camera cannot catch.
A telescope gathers light and magnifies. When it sits on a tracking mount, a camera attached to it can photograph small, distant objects such as galaxies and nebulae at high magnification. The cost is a much heavier, more demanding setup.

What each is good at
A tracker with a wide lens is the best tool for the Milky Way, constellations, large star fields and wide nebulae such as the North America Nebula in a longer lens. It is light enough to carry on a hike and quick to set up.
A telescope on a good equatorial mount is the best tool for galaxies, planetary nebulae and the fine detail of nebulae. It can also photograph the Moon and planets, though those need a different technique, which we cover in telescopes for planets.
Costs and the hidden extras
A tracker setup needs a camera that allows manual exposure, a lens, a sturdy tripod, a ball head and the tracker itself. If you already own a camera, the extra cost is modest. Our picks are in telescopes and gear for astrophotography.
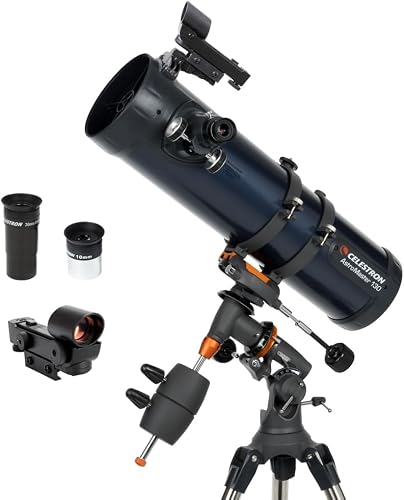
A telescope setup is a longer list: a telescope, an equatorial mount capable of accurate tracking, a camera, a guiding setup, a laptop or controller and software. The telescope is often the smallest part of the bill. That is why many people who buy a telescope first end up shopping for a better mount.
Difficulty and time
Trackers are easy to learn. You align to the pole, set the camera, shoot a series of frames and stack them. The first night can produce a good Milky Way photo.
Telescope imaging is harder. You need accurate polar alignment, good focus, guiding to correct small tracking errors and many hours of exposure on a target. It is rewarding, and it is slow to master.
The weight limit trap
Every tracker has a payload limit, a maximum weight it can carry and still track accurately. A camera with a modest lens fits. A telescope, even a small one, usually does not. Many beginners buy a tracker and then try to put a heavy lens or a telescope on it, and the tracking fails. Always check the payload on the listing, and leave some margin.

What a first night looks like with each
With a tracker, you arrive at a dark spot, set up the tripod and mount the tracker with the camera on top. You point the polar axis at the pole, set the camera to a long exposure and take a test frame. If the stars are round, you take a series of frames, maybe thirty or forty, and spend the rest of the night shooting. Back home, you stack them and adjust the contrast. Within a couple of hours of getting home you have a finished image.
With a telescope for deep-sky imaging, the first night is usually a fight with the equipment. You balance the telescope on the mount, align the pole, focus the camera, set up guiding and then find the target. Each step can go wrong. Many beginners spend several nights just getting a round star at the edge of the frame. That is not a reason to avoid it, but it is a reason to expect a slower start.
Can you do both with one mount?
Some equatorial mounts are built to carry either a camera or a small telescope, and the larger trackers can hold a small refractor with a light camera. These are middle-ground options for people who want to grow. If that appeals, read the payload figures on the listing carefully, and leave room for the weight of a camera, guide scope and accessories. A mount working near its limit tracks badly.
For most beginners, the simplest route is still the best: one tracker, one camera, one lens and a lot of practice.

Viewing vs photographing
If your goal is mostly to look through a telescope, spending money on photography gear is a distraction. A good Dobsonian shows far more to the eye per dollar than any tracker setup. See telescopes for galaxies and nebulae for the best visual options.
If you want both, buy in stages. Learn the sky with your eyes first, then add a tracker for wide-field photos, then think about a telescope for imaging.
A simple decision guide
- You want Milky Way and constellation photos: buy a star tracker.
- You want Moon and planet photos: any tracking telescope with a camera works, or even a phone at the eyepiece.
- You want faint galaxy and nebula photos: plan for an equatorial mount, a telescope and a guiding setup, and budget accordingly.
- You mostly want to look: buy a visual telescope and skip imaging gear for now.
A quick look at polar alignment
Polar alignment is the step that makes tracking work. A tracker turns around an axis, and that axis has to point at the celestial pole, the point in the sky around which everything appears to rotate. In the northern hemisphere, that is close to the bright star Polaris. Most trackers have a small polar scope that lets you line up the pole by eye, and some have electronic aids that do it with a camera and software.
A rough alignment is enough for short exposures with a wide lens. A precise one matters when you use longer lenses or take longer exposures. The skill is learnable in an evening, and it gets faster every time you do it. If you plan to travel with your gear, practice in your backyard first so that your first dark-sky night is not a puzzle.
Camera and lens basics
You do not need a special camera. Any camera that lets you set exposure by hand, shoot raw files and use a lens with a wide aperture will do. A fast, wide lens captures more light and shows more of the sky. A typical starting point is a lens that is wide open at a bright aperture, an exposure of 30 to 90 seconds on a tracker and a high but not extreme sensitivity setting. Stack a dozen or more frames to reduce noise.
A sturdy tripod matters, since any shake spoils a long exposure. Hang a weight from the center column on windy nights, and use a remote release or a timer so that pressing the shutter does not shake the camera.
Budget thinking
A tracker setup lets you spread the cost out. You can start with the camera you already own, add a tracker and learn on that. If you later decide to move up to a telescope, the tripod, the camera and the skills carry over. Buying a telescope first and then discovering you need a better mount means paying twice.
That staged approach also fits the way most people learn. You discover what you like before you spend serious money, and your next purchase is guided by experience.
Common mistakes
Buying a telescope and a cheap mount. The mount decides photo quality. A poor one wastes a good telescope.
Not learning polar alignment. Poor alignment ruins long exposures. Practice on a clear night before you travel.
Starting from a bright site. Light pollution washes out faint detail. Find a darker spot.
Expecting instant results. Raw frames look dull. Stacking and processing bring out the detail.
Where to go next
If you want to start with a tracker, see our astrophotography picks. If you are leaning toward a telescope, read how to choose a telescope first. For more on the right gear for deep-sky viewing, see telescopes for galaxies and nebulae.
How we research
We compare payload, mount type, intended use and owner feedback on listings. This is research, not hands-on testing. For how we work and how we earn money, read our about page and affiliate disclosure.
Frequently asked questions
Is a star tracker better than a telescope for beginners?
For photography, often yes. A tracker with a camera and lens is cheaper and easier to learn, and it can capture the Milky Way and large nebulae. A telescope adds reach but needs a good mount.
Can I use a star tracker with a telescope?
Only a very small one. Most trackers are rated for a camera and a modest lens, and a telescope is usually too heavy. Check the payload on the listing.
What can a star tracker shoot?
The Milky Way, constellations and wide patches of nebulosity. It cannot show small, faint galaxies at high detail without a longer lens.
Do I need polar alignment?
Yes. A tracker has to be pointed at the celestial pole to follow the sky accurately. It takes a few minutes once you have practiced.
Do I need a special camera?
A camera that allows manual exposure and a decent lens works. A dedicated astronomy camera is a later step.
How much does a star tracker cost compared with a telescope?
Star trackers can cost less than a telescope with a tracking mount, but you still need a camera and lens. Total costs are often similar.
Can I use a star tracker for visual observing?
No. A tracker holds a camera for long exposures. For looking at the sky with your eyes, a telescope or binoculars is the tool.
What lens do I need with a star tracker?
A wide or short-telephoto lens works best, since trackers handle light loads. A 50 mm to 135 mm lens is a common range.
Keep reading
Planets, Galaxies and Photos Best Telescopes and Gear for Astrophotography: Four Picks Four picks for astrophotography, from camera star trackers to planetary imaging scopes, with honest advice on what each can shoot and what takes more gear. 8 min read · Updated Oct 25, 2026 Planets, Galaxies and Photos Best Telescopes for Planets: Five Scopes for Sharp Views Five telescopes for viewing Jupiter, Saturn, Mars and the Moon, compared by aperture, optics and ease of use, with honest notes on what each will show. 8 min read · Updated Oct 23, 2026  Planets, Galaxies and Photos Best Telescopes for Galaxies and Nebulae: Four Light Buckets Four telescopes for seeing galaxies, nebulae and star clusters, compared by aperture and ease of use, with honest notes on what faint objects really look like. 8 min read · Updated Oct 24, 2026